Slow Cooker Roast with Gravy


Ingredients:

2-3 pounds of your preferred roast (such as chuck or sirloin)
3/4 cup beef broth
1 tablespoon Kitchen Bouquet (browning and seasoning sauce for roast)
2 tablespoons all-purpose flour
1 can (10.5 ounces) cream of mushroom soup
1 tablespoon red wine vinegar
1 package onion soup mix (1 ounce)
1 tablespoon Worcestershire sauce
1/2 teaspoon each of dried thyme and garlic powder
2 tablespoons butter
1/4 teaspoon black pepper
Instructions:
1. In a bowl, combine beef broth, mushroom soup, onion soup mix, Worcestershire sauce, red wine vinegar, garlic powder, thyme, and pepper. Set aside.
2. Coat the roast with Kitchen Bouquet. Brown it in a skillet.
3. Transfer roast into slow cooker.
4. In the same skillet, melt butter, add flour, and cook briefly.
5. Pour the prepared gravy mixture into the skillet, whisking to loosen browned bits. Cook until the gravy thickens.
6. Pour the thickened gravy over the roast.
7. Cover and cook on low for 7-8 hours until roast is tender

Mana's Pintos and Ham

Another Saturday tradition was mom's pinto beans and ham (served with homemade chowchow relish and a chunk slice of sweet onion), fried potatoes and onions, Mom's Cornbread, and sometimes fried yellow squash coated with cornmeal, salt and pepper. The best lunch ever and so cheap to make!


Do not use canned pintos or Mana will come back from the grave and take a wooden spoon to your butt! Start by sorting your dried pinto beans and remove and broken pieces or pebbles. I use a 16 oz package of beans. Place in a large bowl or pot, covering with water. Let soak overnight or at least 6 hours. I usually add baking soda to the water when I soak my beans it helps with gasiness that comes along with bean territory. In the morning drain the water. 

Add the beans to your crock pot. Cover with fresh water, add all your spices, sugar, oil, pepper and ham or ham hock. I used the large ham hock from the end of our Christmas ham it still had so much meat left on it I knew it would be perfect for this recipe. 

Place the lid on top and cook on high for about 6 - 8 hours. Try not to open the crock pot for the first 3 hours after 6 hours check if the beans are done. If not let them cook some more until tender.

Crock Pot Pinto Beans & Ham 

1 - 16 oz package dry pinto beans
2 - tablespoons baking soda
1 - tablespoon sugar
1 - tablespoons vegetable oil
1/2 - tablespoon pepper
1 - small onion, cut into chunks
1 - ham hock, ham bone or 2 cups of cooked ham

Sort your beans and remove and broken pieces or pebbles. I use one 16 oz package of beans. Place in a large bowl or pot, covering with water. 

Add the baking soda to the water, and let the beans soak at least 6 hours or overnight. After 6 hours or overnight drain the water from the beans. 
Add the beans to a 6 quart crock pot and cover with fresh water. You want the beans to be covered by at least one inch.  
 
Add the pinto bean seasoning, sugar, vegetable oil, pepper and onion. Taste the beans after several hours of cooking and add more seasonings if you think it needs it. I used a total of one tablespoons pepper. 
 
Add one of the following for additional seasoning, one ham hock, ham bone, or slice of country ham cut into pieces. 

Place lid on crock pot and cook on high for about 6-8 hours. make sure the beans stay covered with water, so check occasionally.  If you need more water, then add it. The beans should have a soup consistency. 

In 6 hours, test beans and if they are cooked. Remove ham bone and pull of the meat or remove meat from ham hock and serve. Don't forget the wedge of cornbread. 

Grab the Beano!

Mana's Buttermilk Pancakes


A Saturday morning tradition. As she was blessed with grandchildren, they would demand her pancakes or waffles when visiting. And why not; they were delicious. Bisquick mix....yuck!

Stir well 1 t. Baking soda into 2 cup buttermilk. Add two beaten large eggs.

In large bowl, stir together well...
2 level cups flour
2 teaspoons Baking powder
2 Tablespoons sugar
1 teaspoon Salt
(or 2 c. Self rising flour if you have it and leave off salt and baking powder)

Dump dry mix into buttermilk mixture. Add 2 T. Oil (or 2 T. Melted real butter).

Wisk just to mix well but don't over beat it or pancakes will be tough instead of tender. It will be a little lumpy. No problemo! For waffles the batter should be a little thicker, so not quite as much buttermilk. (Freeze extra waffles, after they are cooled off, in freezer bag and reheat in toaster oven).

I use a flat iron skillet and grease lightly with Pam or you can use a coconut oil. The pan should be hot but not smoking (med-hi). Pour 4" pancakes and watch it start to sizzle in the edges and little craters appear in top. That's when you flip. Brown other side. Add butter and you favorite syrup and/or fruit topping and dig in.

Optional Additions:
Gently fold into batter 1 c. Blueberries.
Or- sliced bananas and walnuts
Or- chocolate chips
Or- whatever!

These are also yummy cooked in a little hot bacon grease, but then again, what isn't better cooked that way!


Mana's Flakey Buttermilk Biscuits (adapted by Cheryl)

A real proper Southern biscuit has a slightly crisp shell and the insides are as soft as an old pillow. That's just common knowledge down home and if you've ever eaten a true Southern biscuit, you'll know the difference. Warm biscuits slathered with butter and your favorite jam or honey are always a hit. I grew up also eating them with molasses or dark Karo syrup. Or maybe split and covered with hot sausage gravy. You can also add 2 cups of shredded cheddar and 2 t. garlic powder for great cheesy biscuits. They are good the morning splitting them, spread on butter, and toast in a toaster oven.

There are some "tricks" I'll share to getting the perfect biscuit. They might sound trivial but trust me they make all the difference in the world. I'll just put those first so you are thinking about it when you start preparation. If you make them a lot, and I'm betting once your family gets a taste they'll be asking for them regularly, this will become second nature and you won't have to read them every time. I could make biscuits in my sleep I've done it so much. So first a little biscuit education!

* One of the unshakeable tenets of Southern cooking is that Southern-style baking requires soft winter wheat flour - the kind with less protein. If you can get your hands on it, use White Lily Flour which has the least protein and less gluten. It makes biscuits and lighter and fluffier. Trouble is, the demarcation line going west for availability of this largely Southern brand, is somewhere around Oklahoma. You won't find it in California, but thankfully you can now buy it online from Smuckers since they bought out White Lily (http://bit.ly/2EyHv2K). What price perfection?! 

Another acceptable flour is King Arthur (use the self-rising kind), but be warned, you just will not get the same perfect result. Here's a comparison of the same recipe and same technique but with two different flours. You can plainly see White Lily is the ruling queen for biscuits, cobbler, scones, cookies, or shortcake. The White Lily biscuits rose a full 1/2" higher than did the King Arthur, the shell crisped better, and most importantly, the innards were as soft as your grannies yellow cake. The King Arthur biscuit was also slightly tough. 

You might be thinking around this point, flour is flour so who cares! You can still make your biscuits with any all-purpose flour, but I'm telling you right now they won't rise properly. They can turn out crumbly, or worse still - tough. Sometimes they will be gluten-y, and none of they were ever ever be soft enough inside to past muster on a Southern table.  Okay, enough about that!


* Make sure you use real salted butter and that it is SUPER cold (I usually take mine out of the freezer and cut it with a sharp knife into small cubes.)


* Don't use a dull edged drinking glass to cut your dough. You need a sharp biscuit cutter. The technique matters. Do NOT twist it at the end because it seals the edges of the dough and keeps the biscuits from rising. Dip the cutter in flour when needed to keep it from sticking to the dough. Bet you didn't know that!


*When you put the biscuits on a cookie sheet, or in an iron skillet, they MUST be slightly 
touching and not spaced wide apart. If you cook them in a cast iron skillet, you want just a tad of grease on the bottom - not a lot, a faint sheen. If I cook bacon or sausage in the pan I'll pour off the grease then lightly wipe the pan with a paper towel leaving a smidgen in the bottom. Also your pan and your grease should be cool.

Preheat oven to 425° F. 


Buttermilk Biscuits Ingredients


2 cups White Lilly Flour (or King Arthur self-rising in which case all you add is extra baking powder and the baking soda)
1Tb. baking powder (yes - tablespoon!)
1 tsp salt
1 stick butter (salted or unsalted) (VERY cold): a good method is to cut up a cold stick into little cubes and then put it in the freezer for about 5 minutes.
Whisk together the buttermilk and honey:  

3/4 - 1 cup-ish VERY COLD buttermilk (use enough until the dough is just barely wet enough)
2 T. Honey (this can be omitted if you don't have it)
biscuit-butterIn a large bowl, whisk together the flour, baking powder, baking soda, and salt. (If you are using self-rising flour, add 3 t. baking powder and 1/2 t. baking soda and use a whisk to mix the dry ingredients well before adding the butter.)

Take the butter cubes from freezer and and cut them in with a hand pastry cutter (or pulse a few times in a food processor). You want the butter pieces no bigger than peas – the mixture should resemble coarse meal. Work fast because you don't want the cold butter to warm. Here's why: Part of what makes biscuits rise and be so tall and fluffy is the cold butter hitting the heat of the oven and creating steam. The steam pushes the biscuits up, up, up! If you want, you can stick the bowl of flour and butter into the frig to chill for 10 minutes.

Meanwhile, whisk together the buttermilk and honey in a measuring cup. Add to the bowl with the butter/flour mixture and stir gently just until the dry ingredients are moistened.

Turn the dough onto a lightly floured work surface and knead gently about 3-4 times to bring it together (easy does it). You'll sprinkle on small amounts of flour as you go to reduce stickiness and wetness, and also sprinkled on your rolling surface. The dough may still be a little crumbly, that’s fine. Roll or pat the dough into a 9×5-inch rectangle about 1/2-inch thick. Fold the dough into thirds like a business letter (using the long sides of the rectangle). Once again, roll the dough into a 9×5-inch rectangle about 1/2-inch thick, and again fold it into thirds like a letter. Roll the dough out to 3/4" thickness (the shape doesn’t really matter). Using a sharp biscuit cutter, cut biscuits from the dough (IMPORTANT! Don’t twist the cutter, use a straight up and straight down motion) and transfer to the prepared baking sheet. Gather the scraps and cut more biscuits once or twice to get as many as possible.) The last thing before putting these in the oven is to make a fist and you one knuckles to push down on each biscuit making an indention. Why you might well ask!  Because, believe it or not - they will rise better!

Bake in preheated oven for 11-14 minutes, or until the biscuits have risen and are golden brown on top. Optionally brush the tops with a mixture of melted butter and honey and serve warm.


Ambrosia Salad


Another holiday must!
Ambrosia is a staple at almost every holiday feast in the South. The basic ingredients are oranges, pineapple, coconut, mini marshmallows, pecans, maraschino cherries and cream. In the south congealed Jello-O or fruit salads are a serious thing. You either love em or hate em.


Ingredients

1 - 20 oz can pineapple chunks or tidbits, drained

1 - 11 oz can mandarin orange segments, drained or 2 cups fresh clementine segments

1/4 - cup maraschino cherries, drained and rinsed

1/2 - cup seedless green or red grapes, halved

1/2 - cup apples, chopped

1 - cup miniature regular of colored marshmallows

1 - cup sweetened flaked coconut, toasted, optional

1/3 - cup toasted pecan halves

1/4 - cup light sour cream or plain yogurt

1 - 8 oz container cool whip, whipped topping


Drain pineapple and mandarin orange segments and set aside. If using fresh clementines, peel and break apart into segments.

In large bowl, combine pineapple, mandarin oranges or clementines, grapes, cherries, apples if using, marshmallows, coconut (if using) and pecans.

In a separate bowl using a whisk combine the Greek yogurt or sour cream and whipped topping.

Add the whipped cream mixture into the fruit and gently fold. Add mixture into a bowl and refrigerate, covered for 2 - 4 hours before serving.

Servings: 4 to 6

How to Toast Pecans: Place pecans in a microwave-safe dish. Microwave, uncovered, on high for 1 -2 minutes or until lightly toasted, stirring between each minute. Watch carefully to avoid burning the nuts. I always start out with a minute, because every one's microwave is different.

The Yummiest Vegetable Soup

  • Prep Time: 10 mins
  • Cook Time: 45 mins
  • Total Time: 55 mins
  • Yield: 6
  • Description

    A soul-soothing bowl of delicious vegetable soup, perfect for lunch paired with crusty bread or mana's cornbread.

    Ingredients

    • 2 tbsp olive oil
    • 1 large onion, diced
    • 3 cloves garlic, minced
    • 3 medium carrots, diced
    • 3 stalks celery, diced
    • 2 medium potatoes, peeled and diced
    • 2 tsp Italian seasoning
    • 4 cups vegetable broth + 1 cup water
    • 2-15oz can diced tomatoes
    • 1 cup corn (I used thawed from frozen)
    • 1-15oz can kidney beans, drained and rinsed (optional)
    • 1 bay leaf
    • 1/4 cup parsley, chopped
    • 1 tbsp freshly squeezed lemon juice, more to taste
    • 1 1/2 tsp kosher salt, more to taste
    • Freshly ground black pepper


    Optional: You can add cubes of sirloin beef

    Instructions

    1. Heat oil in a large stockpot or dutch oven over medium-low heat. Once hot, add onion, garlic and a teaspoon of kosher salt and cook about 8 minutes. Add carrots, celery, potatoes and cook for 5 more minutes, stirring often. Add Italian seasoning and cook for one more minute.
    2. Add broth, water, tomatoes, corn, beans, bay leaf, and several grinds of pepper. Bring to a boil and then reduce the heat to low and simmer, covered until the vegetables are tender, about 35 minutes.
    3. Remove from heat and stir in parsley and lemon juice. Remove bay leaf and season to taste with salt (don’t be shy, I added lots of salt!) and pepper. Serve hot with crusty bread.

    Mana's Classic quiche Lorraine

    Cheryl's Chicken 'n Dumplings


    2 1/2 lb. chicken (I always buy one of the $5 already roasted chickens at Costco!

    1/2 t. salt

    1/2 t. pepper

    2 cups plain flour

    Broth from chicken

    1/2 stick butter

    1 whole chopped sweet onion (I use Vidalia or some other sweet yellow onion, but regular yellow onion is fine. I like onion so usually use a large one.)

    Put the whole roasted chicken along with all the juice in in it, into a large heavy pot, cover with water, bring to a boil, reduce heat and simmer for at least 1 hour or until the chicken and bones have released all of it's wonderful flavorful broth. (I learned from my friend Donald, who trains service dogs that if you cook the bones until they are very soft, you can grind them up in a blender or food processor and give them to your dog! Don't ever give a dog a brittle whole bone though as it is very dangerous for them.)

    Pull all the soft chicken meat off the bones, discarding skin, and chop or tear up chicken to bite-size pieces and set aside. Try and not leave stray little bones in the broth that would be a choke hazard.

    Saute the whole chopped onion and about 1 t. of minced garlic (I used minced garlic that comes in a jar), in a skillet in about 3-4 Tablespoons of real butter until soft. Don't burn!

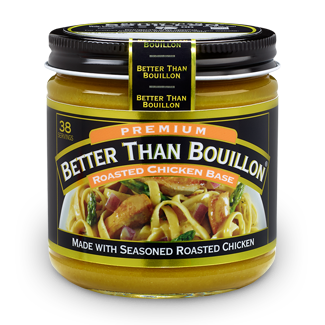
    Roasted Chicken BasePour the sauteed onions into the broth water. If you want more broth, add water and add a big scoop of "Better Than Bouillon Roasted Chicken Base". This stuff is AMAZING!! and the base of just about anything I make that calls for chicken broth. Skip the expensive boxes and cans. Never ever use those nasty little cubes. Better Than Bouillon is available at just about any grocery store, but I get it in bigger jars for a much better price at Costco in the spice section. Keep it in your frig once opened. Use this in your chicken and dumplings just to further flavor the broth water. I don't measure anything - I taste - add - taste....you get the idea! At this point, since I'm a taster cook, I'll sample the broth and adjust the flavor to my likening, usually adding a little salt (careful not to overdo!), pepper to taste, and a generous shake of poultry seasoning - probably about 1 t., but again, just taste as you go. Also add about 1/2 stick real butter (you can adjust this too - less or more depending on your preference. You do need this extra fat though as it is what you are making the dumplings with.)

    (UP TO THIS POINT, THIS IS GLUTEN FREE, SO IF YOU ADD RICE, FOR INSTANCE, YOU CAN JUST MAKE A GLUTEN-FREE CHICKEN & RICE SOUP.)

    Now for the dumplins! These aren't the bread-y or mushy dumplings. These are the hearty, chewy dumplings that are the only real dumplings. No leavening like baking powder or egg. Forget that!

    I also don't ever measure this because if I want a lot of dumplings (and who doesn't), I use more flour and broth, but here the the general dumpling recipe - adjust to your preference because it's so crazy easy!!

    DUMPLINGS:
    Related imageIn a bowl, mix together 2 cups general purpose flour and 1/2 teaspoon salt.
    Add chicken broth from your pan to the flour/salt mixture a 1/4 c. at a time until you have a ball of dough about like bread dough that you can roll out. A note about this: If you use very hot broth, it will immediately start cooking the flour and could get lumpy, so I also let the broth cool down a bit before using it to make the dumplings. Just dip some out of your big pot and set it aside for a bit.
    If, after making this once, you decide you want more dumplings, just play with the proportions of flour and broth. That's essentially all the dumplings are made with so you really don't have to measure anything.

    Dump this dough onto a floured surface and sprinkle with some more flour to reduce stickiness so you can handle it a bit. Form into a ball - kneading not necessary. Sprinkle with more flour as needed to control it from sticking the the surface or the rolling pin. Roll it out into a thin rectangle and use a pizza roller cutter to crisscross cut into squares that aren't too huge. I usually go for about 3/4" width by 1 1/2" length. Whatever...not a huge deal. Drop the dumplings into the broth which should be at a rolling boil. Drop only a few at a time until you have got them all in. Now - DON'T STIR AT ALL!! Put a lid on your pan, turn down the heat to a simmer - but still boiling, and cook for 45 minutes, covered. Do not lift the lid and stir!

    After dumplings have cooked completely, dump back in the chopped up chicken and let it warm up in the broth for a couple of minutes. If you like vegetables in this, you can add them at this time as well. I have used peas and carrots from a can; I've used frozen mixed vegetables that I go ahead and cook in the microwave before adding; I've used just corn. Do what makes you happy but it's good without veges too. Add pepper to taste, or it can be added by individuals at the table.

    If you like the soup part to be thicker (I do) I put about 1/2-3/4 c. of corn starch in a small jar and add some cold water and shake it to mix. I pour this straight into the chicken and dumplings as a last step and heat to thicken on low heat - maybe 5-8 minutes, but keep the heat low and stir. Adjust this for your thickness preference.

    This is a lot of words, but trust me this is sooooo easy to make. These are just the basic instructions, but you can see this could be easily adjusted by just using more than one chicken, making more dumplings, more broth, veges or not, etc. You'll be making this without a recipe soon, like I've been doing for 30 years.

    Enjoy! - - Cheryl


    Mana's Butter Dips (great with hot homemade vegetable beef soup)

    Southern Green Beans

    During the cooking process, these green beans soak up an amazing amount of flavor from bacon grease, chicken broth, seasoned salt, and garlic powder. I start by cooking some diced bacon in a large pot. I then set the bacon aside, but leave all the grease in the pan. You can leave the bacon in the pot to cook with the beans, but it will get a soggy texture. But the up side is the beans will have even more bacony flavor. In this case, I’ve added the cooked bacon back once I’ve drained the beans, but sometimes I just leave it in the pot for the cooking process.

    Many times a ham hock is used instead of bacon, or in addition to bacon. Traditionally, fat back (solid fat from a pig’s back) was a very popular choice for cooking green beans in the South and if you can get your hands on some good fatback, it is amazing. But good fatback is very hard to find these days. Mass market pigs are pumped full of hormones, etc. 

    You want to cook Southern-Style Green Beans for at least an hour, preferably closer to 2 hours. You want them to get really soft, but not mushy, so that they are melt in your mouth tender. Just before serving, you can mix in a tablespoon or so of butter or bacon grease (my personal preference because, let's face it, everything tastes better with bacon) to give the green beans some a flavorful coating.


    Ingredients
    • 4 slices bacon,, diced (or more!)
    • 2 pounds green beans ends snapped off and longer beans snapped in half
    • 2 cups chicken broth
    • 2 cups water
    • 1 teaspoon seasoned salt
    • 1/2 teaspoon black pepper
    • 1/2 teaspoon garlic powder
    • 1/4 teaspoon red pepper flakes
    • 1 tablespoon butter, optional
    Instructions
    1. Brown and crisp bacon in a large pot. Remove bacon from pot and reserve.
    2. Add green beans to pot along with all remaining ingredients, except butter.
    3. Bring to a boil and then turn heat to medium-low. Cover and simmer for 1-2 hours, stirring occasionally.
    4. Drain beans and add butter if using. Check beans for seasoning and add extra salt and pepper to taste. I like lots of black pepper. Sprinkle with bacon and toss to distribute the bacon and butter.

    Mana's Fudgy Pudding Cake (no eggs!)

    Warm Fudgy Pudding Cake


    Serves 6 to 8
    For the cake:
    1 cup (5 ounces) all-purpose flour
    3/4 cup (6 ounces) white sugar
    2 tablespoons unsweetened cocoa powder
    2 teaspoons baking powder
    1/2 teaspoon table salt
    1/2 cup (4 ounces) milk, whole or 2%
    2 tablespoons unsalted butter, melted
    1 teaspoon vanilla
    For the pudding:
    1/2 cup (4 ounces) white sugar
    1/2 cup (4 ounces) brown sugar
    1/4 cup (2 ounces) unsweetened cocoa powder
    1 cup (8 ounces) cold water
    Vanilla ice cream for serving, optional
    Heat the oven to 375°F. Grease or spray with non-stick cooking spray an 8"x"8 baking pan.
    Sift the flour, sugar, cocoa powder, baking powder, and salt through a fine-meshed strainer into a mixing bowl. Combine the milk, melted butter, and vanilla. Pour the liquids over the dry ingredients, and stir gently with a spatula just until no more dry flour is visible. Scrape this batter into the pan and smooth the top.
    For the pudding layer, combine the white sugar, brown sugar, and cocoa powder in a small bowl. Pour over the cake batter and shake the pan to evenly distribute the sugars.
    Pour the cold water over the sugars. Do not stir. Put the pan immediately into the oven and bake for 40 to 45 minutes. As it bakes, the cake will rise to the top while the pudding forms beneath. The cake is finished baking when the edges of the cake turn dark brown and crispy, and when the top of the cake is shiny and dry to the touch.
    Let the cake cool for at least 15 minutes before serving. Scoop slices of cake and the pudding beneath into individual bowls and top with ice cream. Leftovers will keep refrigerated for up to a week and can be reheated for 20 seconds in the microwave.
    Best served warm and with a generous scoop of vanilla ice cream.

    Cheryl's Southern Sweet Potato Casserole

    INGREDIENTS

    For the Sweet Potatoes

    • 6 large sweet potatoes (I like the dark orange/red ones)
    • 1/2 c. packed dark brown sugar
    • 1/4 c. molasses
    • 3 large eggs, beaten
    • 1/3 cup frozen condensed orange juice pulp
    • 3 tablespoons unsalted butter, melted
    • 1 teaspoon pure vanilla extract
    • Lots of cinnamon (we like a lot so I just dump it in until its the right color!) If you are a measurer - start with 2 t. and add more if you want
    • 1/2 teaspoon coarse salt
    For the Crumble Topping
    • 3 tablespoons unsalted butter, slightly softened
    • 1/2 cup packed dark-brown sugar
    • 3/4 cup chopped pecans
    • (or you can always use marshmallows depending on what you like)
    • DIRECTIONS

      1. Preheat oven to 375 degrees.
      2. Make the sweet potatoes: Place sweet potatoes on a baking sheet and roast until very tender, about 1 hour and 20 minutes. Remove from oven and let cool slightly. Reduce oven temperature to 350 degrees.
      3. When potatoes are cool enough to handle, cut in half, scoop flesh into a bowl and mash until smooth. You should have 6-7 cups of mashed sweet potato. Stir in brown sugar, molasses, beaten eggs, orange juice, vanilla, melted butter, cinnamon, and salt; transfer to a casserole pan (size depends on how much you make - 8x10" minimum)
      4. Make the topping: In a small bowl, mix together butter, brown sugar, and pecans. Sprinkle over sweet potato mixture. Transfer to oven and bake until nuts are toasted and casserole has puffed, about 30 minutes. Serve.

    Russian Tea Mix

    2 jars (21.1 ounces each) orange breakfast drink mix like Tang (do they even make Tang anymore?)
    1 cup sugar
    1 envelope (5 ounces) sweetened lemonade drink mix
    1 jar (3 ounces) unsweetened instant tea
    2-1/4 cups red-hot candies
    2 teaspoons each ground allspice, cinnamon, cloves and nutmeg
    Mix all the above ingredients. Place in a covered jar.
    To Serve: Use 3 to 4 t. mix in large mug. Fill with boiling
    water. Stir well and enjoy!

    MANA'S CHEESE BISCUITS

    Make one week in advance and store in tins after cooled. 

    Mix together:
    1/2 lb. Grated sharp cheddar cheese
    2 c. Flour
    1/8 t. Red pepper
    Cut in 1 stick soft butter until cornmeal consistency.
    Form small balls. Press pecan half into top.

    Bake on cookie sheet at 350 degrees for 20 min.
    Makes 3 doz. After cooled, store in airtight tins. Seem to get better as they age (about a month) although they can be eaten sooner.

    Mana's Pecan Sandies

    These melt-in-your-mouth cookies, dusted with powdered sugar, were always made for Christmas.


    Cream together:

    1 cup soft butter
    1/4 c. Powdered sugar

    Add and mix well:
    2 t. Vanilla
    1 T. Water
    2 c. Flour

    Add: 1 c. Chopped pecans

    Make into balls and bake on cookie sheet at 300 degrees for 20 min. Roll in powdered sugar after letting cool a bit.

    GRANDMA SMITH'S CRANBERRY SALAD

    This is another family holiday standard and can be prepared a day or two ahead.  Use a jello mold or just make and serve in a casserole 9x5 dish.  This recipe is usually doubled for large family gatherings and is good with leftovers.

    Ingredients

    2 small boxes of orange Jello
    1 can whole cranberry sauce (Mana always uses fresh cranberries and cooks them down to make her own cranberry sauce)
    1 small can crushed pineapple in it's own juice
    Sugar to taste (about 1/4 c)
    Grated rind of 2 large naval oranges
    Juice of 2 oranges
    1/2 c. chopped pecans

    Directions

    Mix Jello in 2 c. hot water, stirring to dissolve and let this cool thoroughly but not set
    Once the Jello is cook, add the other ingredients and stir together. 
    Pour into Jello mold or dish it will be served in. Refrigerate.

    Note:  This is good to prepare a couple of days before you need it. Keep covered in the frig.

    HOLIDAY CORNBREAD DRESSING

    Another Thanksgiving and Christmas mainstay in Mana's homemade Southern Cornbread Dressing.  There never seems to be enough and it's even used in leftover turkey sandwiches. 

    INGREDIENTS                                                                                                  

    Prepare 2-3 days in advance and let it sit out to dry thoroughly before crumbling together in large mixing bowl on preparation morning
    - Two 8" skillets of Mana's Cornbread (recipe in blog post)
    - 10 large biscuits (you can make homemade or use the frozen biscuits)

    DIRECTIONS
    Preheat oven to 425° and lightly spray Pam in a 13x9x2 pan (Mana often used the broiler pan that comes with an oven).  Cooking time is 45 min., or until edges are brown. Don't overcook.

    -  Crumble the dry cornbread and biscuits (Mana: "It's important not to use too many biscuits or dressing will be doughy.")
    -  2 c. chopped onions
    -  2 c. chopped celery
    -  2 raw eggs (lightly beaten)
    -  black pepper to taste (NOTE: additional salt not necessary or advised)
    -  Dry rubbed sage (start with 2 T.) (Mana:  "Sage should be added slowly and to taste. If it is too much it will make dressing bitter and greenish and ruin it.  Frequent tasting as you add is important...and tasty!)
    -  2 c. drippings saved from the cooked turkey (NOTE: The drippings are essential for putting wonderful flavor in the dressing, but too much of it can possibly make the dressing too greasy.  Mana always boils the turkey giblets just covered with water and uses the broth from that as part of the liquid in the dressing. For additional liquid if you don't want to boil giblets, use store-bought chicken stock).

    The trick is adding the right amount of liquid so dressing isn't too dry when it's cooked but not so much that it's soupy.  The right consistency to accomplish the desired wetness is about like uncooked cornbread batter.
    Add the drippings and stir everything together thoroughly.  Start adding canned stock slowly while stirring until consistency is wet and about the consistency of uncooked cornbread.  Taste to see if it has enough sage and add a little at a time to taste (don't overdo it!).  Mana usually mixes the dressing up a couple of hours before she cooks it so the flavors blend and are enhanced.


    Grandma Smith's Luscious Pound Cake

    Grandma Smith made grandpa a pound cake every Saturday which he ate all week.

    Set out 1/2 lb unsalted butter to soften
    1/2 c. Oleo margerine
    3 c. Plain flour (measure sifting)
    1/2 t. Baking powder
    3 c. Sugar with a dash of salt
    5 eggs (room temperature)
    1 c. Sweet milk (room temperature)
    1 t. Vanilla
    1 t. Lemon flavor, or zest from one lemon (not the juice) a(opt.)

    • Directions: Cream butter, margarine and sugar then add eggs one at a time.
    • Alternate dry with wet ingredients, beginning and ending with dry.
    • Add vanilla and lemon flavor last.
    • Pound cake must be cooked in a greased and floured tube pan (so it has a hole in the center).

    Bake at 300° for 1 hr. Then turn down to 275° and cook 20-30 minutes more.
    Don't open and close oven door or Bang around causing vibrations or cake could "fall"... but even if it does,  it's still good!
    Stick a skewer in it to see if it's done.  Grandma would pull a long straw from hey broom to use. Remove and set on a cooler rack for 10 minutes then carefully turn over onto track to cool thoroughly. Hold your socks,  because you're not going to believe how yummy this is! 

    MANA'S CORNBREAD

    Mana had a special 8" iron skillet that she never used for anything else. The seasoning on this skillet was perfection so her cornbread just slid right out every time. Several pans of this cornbread were made 2-3 days before a big holiday when mom was making turkey dressing. She would also make up her biscuits. 2-day old cornbread and biscuits would be crumbled up as the base for the dressing (don't go too heavy on the biscuits or it will be doughy).

    Preheat oven to 425°.  Use a knife to spread a layer of crisco around the side of an 8" iron skillet and put the pan in the preheating oven while you mix the following ingredients. Only leave long enough to melt the shortening. (option: Mom sometimes used some bacon grease for extra flavor. She poured the grease from breakfast into an aluminum canister conveniently labeled "Drippings", always kept by the stove with a strainer in the top to catch the bacon bits. She'd go a bit lighter on the shortening and add some bacon drippings around the sides, heated the skillet in the oven till it was sizzling but not smoking, and poured into the mixed batter just before popping in the oven. Gently fold in the grease (let's call it what it is), poured back into the hot skillet, so it was already cooking a crust on the bottom before you ever put it in the oven. Don't overcook! 

    Mix together:

    2 c. self-rising corn meal
    1/4 - 1/2 c. All Purpose Flour (use Gluten-free flour in same proportions)
    1 t. baking powder
    3/4 t. salt
    1 t. baking soda
    2 c. buttermilk

    DON'T EVEN THINK ABOUT PUTTING SUGAR IN MANA'S RECIPE!!

    Remove the iron skillet of melted shortening and pour heated oil on top of the mixture and mix all together.  Pour batter back into the preheated iron skillet and bake 20-30 min. (To test if it's done, at 20 min. insert a knife into the center and withdraw to see if wet batter is on the knife blade. If knife comes out clean, remove from the oven.  Overturn onto a plate.

    Note:  Mana had a skillet she used only for cornbread and nothing else and she only wiped it out with a paper towel between uses. Her cornbread never sticks because of the well-seasoned skillet!

    Daddy loved to take leftover cornbread and crumble it into a tumbler that he then filled with ice-cold buttermilk. He'd eat this with a spoon; don't know it till you've tried it!


    Mom's Brownies

    Mom made these my whole childhood and everyone loved them! They were sticky, chewy goodness. Sometimes we couldn't wait for them to cool in the pan enough for her to cut them!

    Preheat oven to 325°

    Put 2 sticks margerine or butter in a saucepan and dump 2/3 c. unsweetened cocoa on top. Put on medium heat and melt the butter.  Stir to blend cocoa into the butter.

    In separate bowl beat 2 eggs and stir in 3 c. sugar one cup at a time.
    Add the chocolate/butter mixture and mix thoroughly.

    Sift together:
    2 1/4 c. all purpose flour
    1 1/2 t. salt
    1 1/2 t. baking powder

    Add dry ingredients to the chocolate mixture and blend well.  Add 3 t. vanilla.  Add optional walnuts or pecans.

    Pour into greased 9x5 casserole.  Bake in preheated oven for 20 min.  Might not look done but it's easy to overcook and if they are they get hard. Remove and let cool very thoroughly before cutting.  These brownies are the chewy-gooey variety and quite addictive!  

    Becky's Angel Biscuits

    ~Makes easy yeast rolls or cinnamon rolls~
    425 degrees


    5 c. all purpose flour
    1/2 c. shortening
    1/2 stick salted butter (let soften on counter - not melt)
    1 t. baking soda
    1 t. salt
    3 t. baking powder
    3 T. sugar
    1 pkg. yeast dissolved in 1/2 c. warm water
    2 c. buttermilk (warmed to 105-120 F.)

    Dissolve yeast in warm water and set aside.  Combine dry ingredients.  Add shortening and butter and mix paddle mixer on low speed until fats are in small pieces the size of peas and smaller.  Mix the warmed buttermilk with the yeast water.  Add to flour mixture, first on low speed, then on medium until everything is well mixed.  Refrigerate dough covered, for several hours or up to 3 days.

    When ready to bake, preheat oven to 425 degrees.  Lightly spray a large (13 x 17 or 15x10) baking pan with non-stick cooking spray, or line with parchment paper.  Turn dough out on lightly floured counteror board and roll to about 1/2" thickness.  Cut into rounds with 2" cutter and place rounds close together in prepared pan(s).  Cover with clean lint-free warm, damp towel and allow to rise about a hour  before baking or doubled in size (you will be able to leave a small indention when pressed lightly with finger.)  Bake 15-20 minutes, or till nicely browned and puffy.  Remove rolls from oven and brush tops with melted butter (you can just take a stick of butter and rub across the top.)  Serve while hot.

    This yields about 30 rolls.

    Variation:  If you want to make cinnamon rolls out of all or part of the dough - after rolling it out, sprinkle with cinnamon and sugar and butter and roll into a jelly roll shape.  Slice with sharp knife every 1".  Place rolled slices in prepared pan with sides touching.  Cover and let rise as above before baking.  While hot, drizzle with icing made from mixing together a little melted butter, powdered sugar, 1/2 t. vanilla and a little milk. Serve warm.

    Legendary Lion House Dinner Rolls

    This recipe came from a cookbook I got at a thrift store in Texas years ago. Just recently unearthed it and made these rolls for a potluck. OMG! Best homemade yeast rolls I've ever had. Bread is my big weakness. I always say - God said man shall not live by bread alone. He didn't say anything about women! Ha!  Anyway, these rolls are legendary (as it says) at the Lion House Restaurant in Salt Lake City.
    Never been to the restaurant, but you absolutely cannot go wrong with these rolls and the recipe makes over 2 doz.


    Legendary Lion House Rolls 
    Ingredients:
    2 - cups warm water
    2/3 - cup nonfat dry milk
    2 - tablespoons active dry yeast 
    1/4 - cup sugar
    2 - teaspoon salt
    1/3 - cup butter, softened + additional to brush on rolls before shaping
    1 - egg
    5 - 5 1/2 - cups all purpose flour

    Directions:
    In your mixer combine water and dry milk. Stir until dissolved. Add yeast, sugar, salt, butter, egg and 2 cups flour. 

    Mix on low speed until ingredients are wet, then for 2 minutes on medium speed. Add 2 more cups flour, and mix on low speed until ingredients are wet, and 2 minutes on medium speed. 
    Add remaining flour (I only add one more cup, and leave out the last 1/2). Once combined, knead with hands, or turn on your kneading function on your bread mixer (if you are fortunate enough to have one! I don't so I knead the old fashioned way.) 
    Place dough in a oiled bowl. Turn over once so dough is covered with oil. Cover with plastic, and let rise in a warm place until double in size. Place dough on floured surface. 

    Roll out dough, and brush with (1/4 cup) melted butter. Cut rolls into desired shape and size. Place on a greased or parchment paper lined baking pan. Let rise in warm place until rolls are doubled in size. 

    Bake at 375 degrees for 15 to 20 minutes or until browned. Brush with melted butter while hot.

    How to freeze rolls: After shaping the rolls place them 2 inches apart on a waxed paper-lined baking sheet. Place the rolls in the freezer and freeze until firm. When the rolls are firm, transfer to a large zip lock freezer bag. Date and freeze for up to 4 weeks.

    To use freezer rolls: Arrange frozen rolls 2 inches apart on baking sheets coated with nonstick cooking spray or covered with parchment paper. Cover rolls with plastic wrap coated with baking spray. Place in a warm place and let the rolls rise until doubled in size. Bake at 375 degrees for 15-20 minutes or until golden brown. Brush with additional butter while hot. This process will take most of the day, so plan early. 

    Recipe yields: 2 dozen

    I checked and this cookbook is sold used on Amazon. It's worth it I think and you can pick it up for $4.