Showing posts with label Entree. Show all posts

Crispy Fried Chicken


Ingredients:

8 Boneless, Skinless Chicken Thighs
2 Cups of Flour
1 Cup of Corn Starch
1 T of Chili Powder
1 T of Garlic Salt
1 T of Onion Powder
1 T of Dried Dill
2 t of Dried Ginger
2 t of Dry Mustard
1 t of Black Pepper
1 t of Nutmeg
2 C of Greek Yogurt
1 T of Lemon Juice
1/2 C of Water

About 4 to 6 C of Avocado Oil or beef tallow for frying. You will need enough oil to fill your cast iron skillet up 3/4's of the way.

For the Glaze:
3/4 C of Soy Sauce
1/4 C of Brown Sugar
1 T of Argo® Corn Starch
4 T of Cold Water

Instructions:

*Combine the flour, Corn Starch and all the seasonings in a bowl and set aside.

* Add your yogurt, lemon juice, and water to a bowl and whisk until smooth.

* Take your chicken thighs and pat them dry with some paper towels then let them rest on a paper towel covered plate.

* Set up your breading station with the flour/corn starch mixture, the yogurt, and the foil covered cookie sheet.

* Begin breading your thighs one at a time by completely submerging the chicken in the yogurt and getting a good coating on them.

* Then add the chicken to the corn starch/flour mixture, making sure you are really pressing the chicken into the mixture and getting the coating in all the cracks and crevices. If you want, you can repeat the process on each piece of chicken, making for a super duper crispy crunch. For this recipe I only did one coating.

* Set your chicken on the cookie sheet and repeat the process until all your chicken is done.
Let sit in the fridge while you prepare the frying oil.
***Please be careful with this as the oil needs to be very hot and you can get burned. Add your oil to the skillet and I let it get very hot to the point where it is almost smoking. Avocado oil is perfect for high heat. Don't use any seed oil!

* Test to make sure it is ready for frying by throwing a little piece of the chicken in there. If it floats and fries, you are ready to fry your chicken.

*Place two pieces of chicken at a time in your hot skillet. My thighs were not very thick so they needed to fry for about 12 minutes. CAREFULLY turn them over halfway through cooking. You can use a meat thermometer to check the chicken to make sure it is cooked. The chicken needs to be at 165 degrees. I take the chicken out of the oil at about 160 degrees because the thighs continue to cook about 5 degrees while resting.

*Place your cooked chicken on the cooling rack and let drain. If you have your oil at the right temperature there shouldn't be too much grease to drain.

*Repeat the process until all your chicken is fried.

Optional glaze: For the glaze, add your soy sauce and brown sugar to a small pan and whisk until it starts to boil, then turn down the heat to a slow simmer.
In a small bowl, add the corn dtarch and the water and whisk until smooth.
Add the corn starch mixture to your soy sauce and brown sugar and whisk for about 2 minutes. The sauce should thicken up and you should have a delicious salty sweet glaze to drizzle over the chicken or to use as a dipping sauce.

MONTEREY SAUSAGE PIE

I had this quite a while ago and used to make it for my boys. It really filled them up and is a delicious guilty pleasure. 


Ingredients:

  • 1 pound Bulk Pork Sausage
  • 3 teaspoons Minced Garlic
  • 2-½ cups Shredded Monterey Jack Cheese, Divided
  • 1-⅓ cup Milk
  • 3 whole Eggs
  • ¾ cups Biscuit/baking Mix
  • ¾ teaspoons Rubbed Sage
  • ¼ teaspoons Pepper

Directions

In a large skillet, cook the sausage over medium heat until meat is no longer pink. Add garlic; cook 1 minute longer. Drain. Stir in 2 cups cheese. Transfer to a greased 9-inch deep-dish pie plate.

In a small bowl, combine the milk, eggs, biscuit mix, sage and pepper. Pour over sausage mixture.

Bake at 400°F for 20-25 minutes or until a knife inserted near the center comes out clean. Sprinkle with remaining cheese; bake 1-2 minutes longer or until cheese is melted. Let stand for 10 minutes before cutting.


Slow Cooker Roast with Gravy


Ingredients:

2-3 pounds of your preferred roast (such as chuck or sirloin)
3/4 cup beef broth
1 tablespoon Kitchen Bouquet (browning and seasoning sauce for roast)
2 tablespoons all-purpose flour
1 can (10.5 ounces) cream of mushroom soup
1 tablespoon red wine vinegar
1 package onion soup mix (1 ounce)
1 tablespoon Worcestershire sauce
1/2 teaspoon each of dried thyme and garlic powder
2 tablespoons butter
1/4 teaspoon black pepper
Instructions:
1. In a bowl, combine beef broth, mushroom soup, onion soup mix, Worcestershire sauce, red wine vinegar, garlic powder, thyme, and pepper. Set aside.
2. Coat the roast with Kitchen Bouquet. Brown it in a skillet.
3. Transfer roast into slow cooker.
4. In the same skillet, melt butter, add flour, and cook briefly.
5. Pour the prepared gravy mixture into the skillet, whisking to loosen browned bits. Cook until the gravy thickens.
6. Pour the thickened gravy over the roast.
7. Cover and cook on low for 7-8 hours until roast is tender

Cheryl's Chicken 'n Dumplings


2 1/2 lb. chicken (I always buy one of the $5 already roasted chickens at Costco!

1/2 t. salt

1/2 t. pepper

2 cups plain flour

Broth from chicken

1/2 stick butter

1 whole chopped sweet onion (I use Vidalia or some other sweet yellow onion, but regular yellow onion is fine. I like onion so usually use a large one.)

Put the whole roasted chicken along with all the juice in in it, into a large heavy pot, cover with water, bring to a boil, reduce heat and simmer for at least 1 hour or until the chicken and bones have released all of it's wonderful flavorful broth. (I learned from my friend Donald, who trains service dogs that if you cook the bones until they are very soft, you can grind them up in a blender or food processor and give them to your dog! Don't ever give a dog a brittle whole bone though as it is very dangerous for them.)

Pull all the soft chicken meat off the bones, discarding skin, and chop or tear up chicken to bite-size pieces and set aside. Try and not leave stray little bones in the broth that would be a choke hazard.

Saute the whole chopped onion and about 1 t. of minced garlic (I used minced garlic that comes in a jar), in a skillet in about 3-4 Tablespoons of real butter until soft. Don't burn!

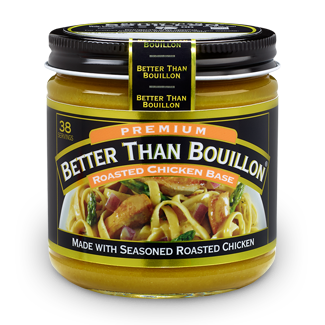
Roasted Chicken BasePour the sauteed onions into the broth water. If you want more broth, add water and add a big scoop of "Better Than Bouillon Roasted Chicken Base". This stuff is AMAZING!! and the base of just about anything I make that calls for chicken broth. Skip the expensive boxes and cans. Never ever use those nasty little cubes. Better Than Bouillon is available at just about any grocery store, but I get it in bigger jars for a much better price at Costco in the spice section. Keep it in your frig once opened. Use this in your chicken and dumplings just to further flavor the broth water. I don't measure anything - I taste - add - taste....you get the idea! At this point, since I'm a taster cook, I'll sample the broth and adjust the flavor to my likening, usually adding a little salt (careful not to overdo!), pepper to taste, and a generous shake of poultry seasoning - probably about 1 t., but again, just taste as you go. Also add about 1/2 stick real butter (you can adjust this too - less or more depending on your preference. You do need this extra fat though as it is what you are making the dumplings with.)

(UP TO THIS POINT, THIS IS GLUTEN FREE, SO IF YOU ADD RICE, FOR INSTANCE, YOU CAN JUST MAKE A GLUTEN-FREE CHICKEN & RICE SOUP.)

Now for the dumplins! These aren't the bread-y or mushy dumplings. These are the hearty, chewy dumplings that are the only real dumplings. No leavening like baking powder or egg. Forget that!

I also don't ever measure this because if I want a lot of dumplings (and who doesn't), I use more flour and broth, but here the the general dumpling recipe - adjust to your preference because it's so crazy easy!!

DUMPLINGS:
Related imageIn a bowl, mix together 2 cups general purpose flour and 1/2 teaspoon salt.
Add chicken broth from your pan to the flour/salt mixture a 1/4 c. at a time until you have a ball of dough about like bread dough that you can roll out. A note about this: If you use very hot broth, it will immediately start cooking the flour and could get lumpy, so I also let the broth cool down a bit before using it to make the dumplings. Just dip some out of your big pot and set it aside for a bit.
If, after making this once, you decide you want more dumplings, just play with the proportions of flour and broth. That's essentially all the dumplings are made with so you really don't have to measure anything.

Dump this dough onto a floured surface and sprinkle with some more flour to reduce stickiness so you can handle it a bit. Form into a ball - kneading not necessary. Sprinkle with more flour as needed to control it from sticking the the surface or the rolling pin. Roll it out into a thin rectangle and use a pizza roller cutter to crisscross cut into squares that aren't too huge. I usually go for about 3/4" width by 1 1/2" length. Whatever...not a huge deal. Drop the dumplings into the broth which should be at a rolling boil. Drop only a few at a time until you have got them all in. Now - DON'T STIR AT ALL!! Put a lid on your pan, turn down the heat to a simmer - but still boiling, and cook for 45 minutes, covered. Do not lift the lid and stir!

After dumplings have cooked completely, dump back in the chopped up chicken and let it warm up in the broth for a couple of minutes. If you like vegetables in this, you can add them at this time as well. I have used peas and carrots from a can; I've used frozen mixed vegetables that I go ahead and cook in the microwave before adding; I've used just corn. Do what makes you happy but it's good without veges too. Add pepper to taste, or it can be added by individuals at the table.

If you like the soup part to be thicker (I do) I put about 1/2-3/4 c. of corn starch in a small jar and add some cold water and shake it to mix. I pour this straight into the chicken and dumplings as a last step and heat to thicken on low heat - maybe 5-8 minutes, but keep the heat low and stir. Adjust this for your thickness preference.

This is a lot of words, but trust me this is sooooo easy to make. These are just the basic instructions, but you can see this could be easily adjusted by just using more than one chicken, making more dumplings, more broth, veges or not, etc. You'll be making this without a recipe soon, like I've been doing for 30 years.

Enjoy! - - Cheryl


Cheryl's Amazing Fried Chicken

A Note About Cooking with Cast Iron: Cast iron cookware has been around for centuries for a good reason; nothing heats more evenly or holds heat longer. People in the south use it a lot! I have cast iron skillets of every size. You can spend a lot of money on enamel covered cast iron cookware Le Creuset, or you can buy good old-fashioned pieces from Lodge at a much lower price (sold at Cracker Barrel as well if you are fortunate to have one close to you!) Both styles work extremely well but the enamel finish is much easier to maintain and clean. Never scrub cast iron. What makes it amazing is the "seasoning" that occurs over repeated use. If you take care of it nothing sticks and cleanup is a breeze! I have a 6" skillet that is only used for frying eggs and making cornbread. I clean it without water or soap by scrubbing with coconut oil and kosher salt and a paper towel.
How To Season Cast Iron:
You season a cast iron pan by rubbing it with a relatively thin coat of neutral food-grade oil (I stress a light coat of oil). Place the lightly-oiled cast iron pan, upside down, in the oven, with a sheet of aluminum foil on the bottom to catch any drips. For future use don't let water sit in it. It rusts. Dry completely. I dry mine on a burner just till water disappears, then lightly spray it with oil, or wipe with paper towel. That way it's ready for use next time.

Cheryl's Amazing Fried Chicken
Yield: about 4-6  servings

INGREDIENTS

Dry Rub
1 tbsp salt
1 tbsp black pepper
1 tbsp garlic powder
1 tbsp onion powder
1 tbsp dry ground mustard
1 tbsp cayenne pepper (if you like heat - moderate by your own taste)

1 chicken, cut into 10 pieces (organic is good). You can also buy boneless, skinless whole breasts if you like white meat only.

To Fry
3 eggs
1 cup buttermilk
1/4 cup water
All Purpose Flour (for coating chicken pieces)
Salt
Pepper
Peanut oil (for frying at higher temps, peanut oil is superior but you can use canola as well, just don't burn the oil)
2 tbsp cornstarch

METHOD
Make Dry Rub: In a small bowl, combine the dry ingredients. Stir to blend. Place the chicken pieces in a plastic resealable bag and sprinkle with the dry rub. Seal bag and toss to coat each piece evenly.
Refrigerate overnight.
Two hours before cooking, remove chicken from the plastic bag and let sit in the
refrigerator to dry out the skin slightly.
To Fry Chicken: Heat 1/2inch of peanut oil in a cast iron skillet to 360°F. Use a candy or instant read thermometer to monitor the temperature. Temp is important throughout cooking. If oil is not hot enough when you put chicken in, the coating will fall off. If it's too hot the outside will burn before the chicken is done.

Lightly beat the eggs and combine with the buttermilk and water in a shallow dish.
In another shallow dish, combine the flour and cornstarch and season with salt and pepper. Set the two dishes side by side next to the cast iron skillet with the flour mixture closest to the stove.
Dip each piece of chicken into the buttermilk mixture; let excess drip off. Transfer to the flour mixture,
turn to coat and then pat until the excess has fallen off. Gently place in the hot oil and fry until golden brown on all sides; use tongs to turn the chicken. Check the internal temperature of the chicken (insert probe into thickest portion of each piece being careful not to touch any bones), if it has not reached 160°F, lower the heat under the skillet to medium and continue to cook, turning occasionally with tongs until done.
Transfer cooked chicken to a wire rack set over a baking sheet. This helps keeps the chicken crispy.
You can also place the baking sheet in a slow oven to keep chicken warm if you have to hold dinner a bit before serving.

BE CAREFUL! OIL SHOULD NEVER SMOKE. 
TO PUT OUT A GREASE FIRE NEVER USE WATER. 
USE BAKING SODA OR FIRE EXTINGUISHER. 
(I keep a big box of soda right by my stovetop for emergencies.)

I dispose of old oil by cooling completely, pouring carefully into an old coffee can or jar (preferably with a lid - - like a mayo jar, or a coffee can.) and setting in the frig to harden. I only put in trash can the day the trash is being picked up.

KFC Chicken

 The KFC Original Secret Chicken Recipe is the heart and soul of the KFC brand, concocted by Colonel Harland Sanders himself. Despite many attempts to decipher the secret blend of 11 herbs and spices, the official recipe remains a secret locked away in a vault in Louisville, Kentucky. However, this recipe will help you create fried chicken that gets pretty close to the real deal.

Ingredients:

  1. 2 cups all-purpose flour
  2. 2/3 tablespoon salt
  3. 1/2 tablespoon dried thyme leaves
  4. 1/2 tablespoon dried basil leaves
  5. 1/3 tablespoon dried oregano leaves
  6. 1 tablespoon celery salt
  7. 1 tablespoon ground black pepper
  8. 1 tablespoon dried mustard
  9. 3 tablespoons paprika
  10. 2 tablespoons garlic salt
  11. 1 tablespoon ground ginger
  12. 3 tablespoons ground white pepper
  13. 1 cup buttermilk
  14. 1 egg, beaten
  15. 1 chicken, cut up, the breast pieces cut in half for more even frying
  16. Expeller-pressed canola oil

Instructions:

  1. In a bowl, combine the flour and all the herbs and spices. This forms your coating mixture.
  2. In another bowl, mix the buttermilk and beaten egg together.
  3. Dip each piece of chicken into the buttermilk mixture, then roll them in the flour mixture. Repeat this process twice.
  4. Let the chicken pieces rest for 20 minutes. This helps the coating adhere to the chicken better.
  5. In a deep pan, heat your oil to 350°F (175°C). Ensure you have enough oil to fully submerge the chicken pieces.
  6. Fry the chicken pieces for 10-15 minutes, until golden brown and crispy. Remember to turn the pieces occasionally for even browning.
  7. Use a meat thermometer to check if the chicken is done – it should read 165°F (74°C) for breasts and 175°F (80°C) for thighs and wings.
  8. Once cooked, place the chicken pieces on a wire rack over a baking sheet to drain any excess oil.
  9. Let it cool slightly and then serve hot for that amazing fresh-from-the-fryer taste!n


Cheryl's Totally Texas Award-Winning Chili

Ingredients:
  • 3 pounds ground beef 80/20
  • 1 pound ground pork
  • 4 slices bacon
  • 3-4 cloves garlic, finely minced
  • 1 large yellow onion
  • 3 cans Stewed Tomatoes
  • Kosher salt
  • Freshly ground pepper
  • Dried Oregano
  • Ground Cumin
  • Gebhardt's Chili Powder (has to be!)
  • 1 fresh jalapeno, size of your thumb
  • SECRET INGREDIENT: Pickled jalapenos, and juice from pickled jalapenos jar
  • you want fatty beef.  Trust me.
  • Masa Flour (~5-6 T.) To thicken at the end

Instructions:

Drizzle some olive oil in a dutch oven/wok pot and turn stove to medium heat.  Chop raw bacon (tip: use scissors!) into bite size pieces and cook, flipping until cripsy, and remove.
Add the ground beef, chopped onion, and garlic to pot, and season with heaping 1/2 tsp of kosher salt and pepper.  Stir it all together nicely (a chopping action with a wooden spoon is perfect).
Once the ground beef starts to brown, season with your first round of dried oregano, ground cumin, and Gebhardts chili powder – 1 heaping teaspoon of each.  (OR SEE DISCLAIMER NOTE BELOW).  Stir/chop nicely again.  You want the beef to have LOTS of flavor!
Once the beef is browned, I personally let it cook more in that fat from the bacon.  Feel free to drain the fat off if you prefer however.  (I think there’s some official proper cooking rule about not letting ground beef boil after browning… but I rebel!)
Crumble the cooked bacon and add back in.
Chop a few pickled jalapeos (to taste, I use about 5), and add to meat.  Then pour about 1/8 cup of the pickled jalapeno juice onto the meat and stir.  You want to hear the sizzle and scrape the bottom of the pot!
Season again with salt, pepper, dried oregano, ground cumin, and chili powder.  I do generous sprinkling two times around the pot, and my calculations say that’s about 1/2 tsp.  turn up the heat to high.
Add the cans of stewed tomatoes.  Stir and start to break up the tomato pieces.
Make slits in the jalapeno with a knife.  Submerge into the chili.
Season one more time with 1/2 teaspoon ish salt, pepper, dried oregano, ground cumin, and chili powder and stir.
As soon as the chili reaches a bubbling boil, turn down to low.
Let the chili simmer until it reached the consistency you want.  If you want it more soupy, it should be ready in about 30 minutes.  If you want it like a real cowboy, it could simmer for a good 2 hours.  Don’t forget to stir occasionally and always scrape the bottom of the pot!
Don’t forgot to taste once it’s cooled off from boiling.  Doctor as needed with the spices.  In my experience, it usually needs a tad more salt and oregano.  If you want more heat (chili powder has the after taste of heat), sprinkle more chili powder.
DISCLAIMER: I have never measured the spices.  I just sprinkle and go with it.  I conservatively calculated the amount I normally use for this recipe.  My recipe calls for 2 TBL chili powder (when I make a large pot of this I use 1/3 cup chili), and a little less of cumin and oregano to give you an idea, so if you want measure that out separately and then divy up that amount to season the 3 separate times I mention (ground beef, post ground pork, post stewed tomatoes). 
Remove the jalapeƱo and discard.  Dish up in bowls and garnish with shredded sharp cheddar cheese, sour cream, and crushed tortilla chips. 

Amazing Meatloaf


Cook 1hr 25 min @ 325 deg
YIELD 6 servings

Ingredients

1 tablespoon good olive oil
3 cups chopped yellow onions (3 onions)
1 teaspoon chopped fresh thyme leaves
2 teaspoons kosher salt
1 teaspoon freshly ground black pepper
3 tablespoons Worcestershire sauce
1/3 cup canned chicken stock or broth
1 tablespoon tomato paste
2 1/2 pounds ground chuck (81 percent lean)
1/2 cup plain dry bread crumbs (recommended: Progresso)
2 extra-large eggs, beaten
1/2 cup ketchup, tomato sauce, chili sauce (your choice)
Preheat the oven to 325 degrees.
Heat the olive oil in a medium saute pan. Add the onions, thyme, salt, and pepper and cook over medium-low heat, stirring occasionally, for 8 to 10 minutes, until the onions are translucent but not brown. Off the heat, add the Worcestershire sauce, chicken stock, and tomato paste. Allow to cool slightly.
In a large bowl, combine the ground chuck, onion mixture, bread crumbs, and eggs, and mix lightly with a fork. Don't mash or the meat loaf will be dense. Shape the mixture into a rectangular loaf on a sheet pancovered with parchment paper. Spread the ketchup evenly on top. Bake for 1 to 1 1/4 hours, until the internal temperature is 160 degrees F and the meat loaf is cooked through. (A pan of hot water in the oven, under the meat loaf, will keep the top from cracking.) Serve hot

Sticky Chicken Legs


This recipe only has 6 ingredients and that's it. All of the ingredients are ones you probably already have in your pantry. The sauce is a sweet and tangy sauce that glazes the chicken.

Cooking Spray
1 - cup ketchup
1 - cup honey
1 - cup brown sugar
1/2 - cup light soy sauce
1/2 - teaspoon garlic powder
8 to 12 chicken legs with skin (3 pounds total)
1 - cup uncooked white or brown rice

Preheat the oven to 350°F. Coat a Dutch oven or 9- by 13-inch baking dish with cooking spray. 

Combine the ketchup, honey, brown sugar, soy sauce, and garlic powder in a medium-size saucepan over medium heat and cook, stirring constantly, until it comes just to a boil and the brown sugar has dissolved, 3 to 4 minutes.

Remove from the heat. Arrange the chicken legs in the prepared baking dish. Pour the sauce over the chicken, turning the pieces with tongs to coat them. 

Place the baking dish in the oven, uncovered, and bake until cooked through, 60 - 90 minutes, turning the legs halfway through the cooking time. 

While the chicken is cooking start on the rice. Cook the rice according to package directions. Place the rice on a platter and arrange the chicken legs on top. Spoon the sauce over all and serve.  

Recipe yields - 4 - 6 servings

Perfect Pot Roast

I love this recipe because it makes it's own gravy which is great over mashed potatoes or rice! You also just can't mess this up - it's perfect every time.

1 - 2 or 3 lb beef pot roast of your choice (I prefer chuck roast)
1 - 10.5 oz can golden mushroom or cream of mushroom soup
1 - packet Lipton beefy onion or onion soup mix (dry)
2 - tablespoons olive or vegetable oil (to sear the meat)
pepper (to taste)
3 - 4 carrots, cut into 2 inch pieces
4-5 med - large potatoes, quartered  or use whole new potatoes

Rinse the roast with water and pat dry with paper towels. Add 2 tablespoons olive or vegetable oil to a large skillet. Bring the heat up and really get that pan hot.

Add the roast and let it sear for about 5- 7 minutes per side. Add the seared roast to the crock pot. 

Sprinkle dry onion soup mix over the roast and add cream of mushroom soup. Cover and set slow cooker on low and cook for 6 - 7 hours. Turn pot roast over about half way through cooking time.

During the last hour of cooking prepare the carrots and potatoes. Peel carrots and potatoes and cut into pieces. I like to par-boil my veggies for about 8 - 10 minutes in a pot of water before adding to my crock pot. 

This way the veggies cook all the way through and they are not mushy when the roast is done. 

Drain the water off the potatoes and carrots and add to the crock pot the last hour of cooking. Season with a bit of pepper and cover and cook the last hour. 

The meat just falls apart and this recipes makes it own gravy. This is so wonderful the next day for roast beef sandwiches, or in flour tortillas or just warmed up and served with some rice.

Note: If you do not want to par boil the potatoes and carrots before adding. Then just add them the last 3-4 hours of cooking which is usually what I do.