MANA'S CORNBREAD

Mana had a special 8" iron skillet that she never used for anything else. The seasoning on this skillet was perfection so her cornbread just slid right out every time. Several pans of this cornbread were made 2-3 days before a big holiday when mom was making turkey dressing. She would also make up her biscuits. 2-day old cornbread and biscuits would be crumbled up as the base for the dressing (don't go too heavy on the biscuits or it will be doughy).

Preheat oven to 425°.  Use a knife to spread a layer of crisco around the side of an 8" iron skillet and put the pan in the preheating oven while you mix the following ingredients. Only leave long enough to melt the shortening. (option: Mom sometimes used some bacon grease for extra flavor. She poured the grease from breakfast into an aluminum canister conveniently labeled "Drippings", always kept by the stove with a strainer in the top to catch the bacon bits. She'd go a bit lighter on the shortening and add some bacon drippings around the sides, heated the skillet in the oven till it was sizzling but not smoking, and poured into the mixed batter just before popping in the oven. Gently fold in the grease (let's call it what it is), poured back into the hot skillet, so it was already cooking a crust on the bottom before you ever put it in the oven. Don't overcook! 

Mix together:

2 c. self-rising corn meal
1/4 - 1/2 c. All Purpose Flour (use Gluten-free flour in same proportions)
1 t. baking powder
3/4 t. salt
1 t. baking soda
2 c. buttermilk

DON'T EVEN THINK ABOUT PUTTING SUGAR IN MANA'S RECIPE!!

Remove the iron skillet of melted shortening and pour heated oil on top of the mixture and mix all together.  Pour batter back into the preheated iron skillet and bake 20-30 min. (To test if it's done, at 20 min. insert a knife into the center and withdraw to see if wet batter is on the knife blade. If knife comes out clean, remove from the oven.  Overturn onto a plate.

Note:  Mana had a skillet she used only for cornbread and nothing else and she only wiped it out with a paper towel between uses. Her cornbread never sticks because of the well-seasoned skillet!

Daddy loved to take leftover cornbread and crumble it into a tumbler that he then filled with ice-cold buttermilk. He'd eat this with a spoon; don't know it till you've tried it!


Mom's Brownies

Mom made these my whole childhood and everyone loved them! They were sticky, chewy goodness. Sometimes we couldn't wait for them to cool in the pan enough for her to cut them!

Preheat oven to 325°

Put 2 sticks margerine or butter in a saucepan and dump 2/3 c. unsweetened cocoa on top. Put on medium heat and melt the butter.  Stir to blend cocoa into the butter.

In separate bowl beat 2 eggs and stir in 3 c. sugar one cup at a time.
Add the chocolate/butter mixture and mix thoroughly.

Sift together:
2 1/4 c. all purpose flour
1 1/2 t. salt
1 1/2 t. baking powder

Add dry ingredients to the chocolate mixture and blend well.  Add 3 t. vanilla.  Add optional walnuts or pecans.

Pour into greased 9x5 casserole.  Bake in preheated oven for 20 min.  Might not look done but it's easy to overcook and if they are they get hard. Remove and let cool very thoroughly before cutting.  These brownies are the chewy-gooey variety and quite addictive!  

Becky's Angel Biscuits

~Makes easy yeast rolls or cinnamon rolls~
425 degrees


5 c. all purpose flour
1/2 c. shortening
1/2 stick salted butter (let soften on counter - not melt)
1 t. baking soda
1 t. salt
3 t. baking powder
3 T. sugar
1 pkg. yeast dissolved in 1/2 c. warm water
2 c. buttermilk (warmed to 105-120 F.)

Dissolve yeast in warm water and set aside.  Combine dry ingredients.  Add shortening and butter and mix paddle mixer on low speed until fats are in small pieces the size of peas and smaller.  Mix the warmed buttermilk with the yeast water.  Add to flour mixture, first on low speed, then on medium until everything is well mixed.  Refrigerate dough covered, for several hours or up to 3 days.

When ready to bake, preheat oven to 425 degrees.  Lightly spray a large (13 x 17 or 15x10) baking pan with non-stick cooking spray, or line with parchment paper.  Turn dough out on lightly floured counteror board and roll to about 1/2" thickness.  Cut into rounds with 2" cutter and place rounds close together in prepared pan(s).  Cover with clean lint-free warm, damp towel and allow to rise about a hour  before baking or doubled in size (you will be able to leave a small indention when pressed lightly with finger.)  Bake 15-20 minutes, or till nicely browned and puffy.  Remove rolls from oven and brush tops with melted butter (you can just take a stick of butter and rub across the top.)  Serve while hot.

This yields about 30 rolls.

Variation:  If you want to make cinnamon rolls out of all or part of the dough - after rolling it out, sprinkle with cinnamon and sugar and butter and roll into a jelly roll shape.  Slice with sharp knife every 1".  Place rolled slices in prepared pan with sides touching.  Cover and let rise as above before baking.  While hot, drizzle with icing made from mixing together a little melted butter, powdered sugar, 1/2 t. vanilla and a little milk. Serve warm.

Legendary Lion House Dinner Rolls

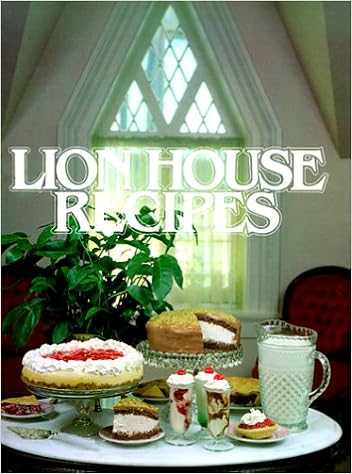
This recipe came from a cookbook I got at a thrift store in Texas years ago. Just recently unearthed it and made these rolls for a potluck. OMG! Best homemade yeast rolls I've ever had. Bread is my big weakness. I always say - God said man shall not live by bread alone. He didn't say anything about women! Ha!  Anyway, these rolls are legendary (as it says) at the Lion House Restaurant in Salt Lake City.
Never been to the restaurant, but you absolutely cannot go wrong with these rolls and the recipe makes over 2 doz.


Legendary Lion House Rolls 
Ingredients:
2 - cups warm water
2/3 - cup nonfat dry milk
2 - tablespoons active dry yeast 
1/4 - cup sugar
2 - teaspoon salt
1/3 - cup butter, softened + additional to brush on rolls before shaping
1 - egg
5 - 5 1/2 - cups all purpose flour

Directions:
In your mixer combine water and dry milk. Stir until dissolved. Add yeast, sugar, salt, butter, egg and 2 cups flour. 

Mix on low speed until ingredients are wet, then for 2 minutes on medium speed. Add 2 more cups flour, and mix on low speed until ingredients are wet, and 2 minutes on medium speed. 
Add remaining flour (I only add one more cup, and leave out the last 1/2). Once combined, knead with hands, or turn on your kneading function on your bread mixer (if you are fortunate enough to have one! I don't so I knead the old fashioned way.) 
Place dough in a oiled bowl. Turn over once so dough is covered with oil. Cover with plastic, and let rise in a warm place until double in size. Place dough on floured surface. 

Roll out dough, and brush with (1/4 cup) melted butter. Cut rolls into desired shape and size. Place on a greased or parchment paper lined baking pan. Let rise in warm place until rolls are doubled in size. 

Bake at 375 degrees for 15 to 20 minutes or until browned. Brush with melted butter while hot.

How to freeze rolls: After shaping the rolls place them 2 inches apart on a waxed paper-lined baking sheet. Place the rolls in the freezer and freeze until firm. When the rolls are firm, transfer to a large zip lock freezer bag. Date and freeze for up to 4 weeks.

To use freezer rolls: Arrange frozen rolls 2 inches apart on baking sheets coated with nonstick cooking spray or covered with parchment paper. Cover rolls with plastic wrap coated with baking spray. Place in a warm place and let the rolls rise until doubled in size. Bake at 375 degrees for 15-20 minutes or until golden brown. Brush with additional butter while hot. This process will take most of the day, so plan early. 

Recipe yields: 2 dozen

I checked and this cookbook is sold used on Amazon. It's worth it I think and you can pick it up for $4.

Cheryl's Amazing Fried Chicken

A Note About Cooking with Cast Iron: Cast iron cookware has been around for centuries for a good reason; nothing heats more evenly or holds heat longer. People in the south use it a lot! I have cast iron skillets of every size. You can spend a lot of money on enamel covered cast iron cookware Le Creuset, or you can buy good old-fashioned pieces from Lodge at a much lower price (sold at Cracker Barrel as well if you are fortunate to have one close to you!) Both styles work extremely well but the enamel finish is much easier to maintain and clean. Never scrub cast iron. What makes it amazing is the "seasoning" that occurs over repeated use. If you take care of it nothing sticks and cleanup is a breeze! I have a 6" skillet that is only used for frying eggs and making cornbread. I clean it without water or soap by scrubbing with coconut oil and kosher salt and a paper towel.
How To Season Cast Iron:
You season a cast iron pan by rubbing it with a relatively thin coat of neutral food-grade oil (I stress a light coat of oil). Place the lightly-oiled cast iron pan, upside down, in the oven, with a sheet of aluminum foil on the bottom to catch any drips. For future use don't let water sit in it. It rusts. Dry completely. I dry mine on a burner just till water disappears, then lightly spray it with oil, or wipe with paper towel. That way it's ready for use next time.

Cheryl's Amazing Fried Chicken
Yield: about 4-6  servings

INGREDIENTS

Dry Rub
1 tbsp salt
1 tbsp black pepper
1 tbsp garlic powder
1 tbsp onion powder
1 tbsp dry ground mustard
1 tbsp cayenne pepper (if you like heat - moderate by your own taste)

1 chicken, cut into 10 pieces (organic is good). You can also buy boneless, skinless whole breasts if you like white meat only.

To Fry
3 eggs
1 cup buttermilk
1/4 cup water
All Purpose Flour (for coating chicken pieces)
Salt
Pepper
Peanut oil (for frying at higher temps, peanut oil is superior but you can use canola as well, just don't burn the oil)
2 tbsp cornstarch

METHOD
Make Dry Rub: In a small bowl, combine the dry ingredients. Stir to blend. Place the chicken pieces in a plastic resealable bag and sprinkle with the dry rub. Seal bag and toss to coat each piece evenly.
Refrigerate overnight.
Two hours before cooking, remove chicken from the plastic bag and let sit in the
refrigerator to dry out the skin slightly.
To Fry Chicken: Heat 1/2inch of peanut oil in a cast iron skillet to 360°F. Use a candy or instant read thermometer to monitor the temperature. Temp is important throughout cooking. If oil is not hot enough when you put chicken in, the coating will fall off. If it's too hot the outside will burn before the chicken is done.

Lightly beat the eggs and combine with the buttermilk and water in a shallow dish.
In another shallow dish, combine the flour and cornstarch and season with salt and pepper. Set the two dishes side by side next to the cast iron skillet with the flour mixture closest to the stove.
Dip each piece of chicken into the buttermilk mixture; let excess drip off. Transfer to the flour mixture,
turn to coat and then pat until the excess has fallen off. Gently place in the hot oil and fry until golden brown on all sides; use tongs to turn the chicken. Check the internal temperature of the chicken (insert probe into thickest portion of each piece being careful not to touch any bones), if it has not reached 160°F, lower the heat under the skillet to medium and continue to cook, turning occasionally with tongs until done.
Transfer cooked chicken to a wire rack set over a baking sheet. This helps keeps the chicken crispy.
You can also place the baking sheet in a slow oven to keep chicken warm if you have to hold dinner a bit before serving.

BE CAREFUL! OIL SHOULD NEVER SMOKE. 
TO PUT OUT A GREASE FIRE NEVER USE WATER. 
USE BAKING SODA OR FIRE EXTINGUISHER. 
(I keep a big box of soda right by my stovetop for emergencies.)

I dispose of old oil by cooling completely, pouring carefully into an old coffee can or jar (preferably with a lid - - like a mayo jar, or a coffee can.) and setting in the frig to harden. I only put in trash can the day the trash is being picked up.